
Creating a bold design in a small space may seem challenging, but it’s very possible my friends! I’m going to walk you through our recent stairs nook update, sharing exactly how we transformed this useless space into another functional area in our home. I’m beginning to believe that home builders include these wasted square footage to taunt us! Am I right? For years I’ve watched this little nook space. I’ve felt irritated that it existed and frustrated because I didn’t know what to do with it.

Inspiration
Those feelings are long gone because while repainting this little corner, inspiration struck in a big way! I decided to combine 2 design features we recently used in previous projects. When dark, moody shiplap meets the simplicity of a pocket desk, the end result is pure MAGIC!
Materials
The Build
We started out by building the middle section of the pocket desk/shelf using Pine Board. A 90- Degree Corner Clamp comes in handy for supporting the board pieces prior to securing them together. This section was installed first to help create a leveled foundation for the shiplap install. I couldn’t imagine completing the shiplap install, only to then find out all the pieces were slanted! Eek! If you’re looking to reduce your project time then I highly recommend Primed MDF Shiplap Siding, simply because the spaces are already built-in and the primed feature makes painting a breeze.


2 – 17.5″ x 3.5″ || 1- 24.5″ x 3.5″
Attempting any wall treatment around the stairs can be tricky. I’m also convinced that we do not have a single straight wall in our home! Airing on the side of caution, we literally measured, cut, and installed each shiplap piece ONE at a time. The actual install was super easy with the help of our trusty brad nailer! Another fantastic tool is our miter saw which allowed us to create all our beautiful, angled cuts! Lastly, we filled and sanded all the imperfect areas, leaving a lovely smooth surface that was ready for painting.


Painting
I can honestly say I didn’t think twice about choosing a paint color for this nook space. If you’re ever looking for a bold color to create a beautiful contrast, then Sherwin Williams Iron Ore will always be my FIRST pick! It was absolutely necessary for us in creating this bold design in a small space! We used an angled paintbrush to paint the corners and a mini roller to paint the rest of the shiplap which resulted in a smooth, even finish.


Staining
How do you find the perfect stain? I like to play mad scientist and mix several options until my dream color is birthed! My personal favorite is combining Varathane Early American Stain with Minwax Natural Stain. I think this combo produces the perfect, rich brown that really enhanced the natural wood texture and details of the Birch Plywood. We also tried something different and added a gloss protective coat on top of the pocket desk, to help eliminate stains and scratches. Fingers crossed it works out!


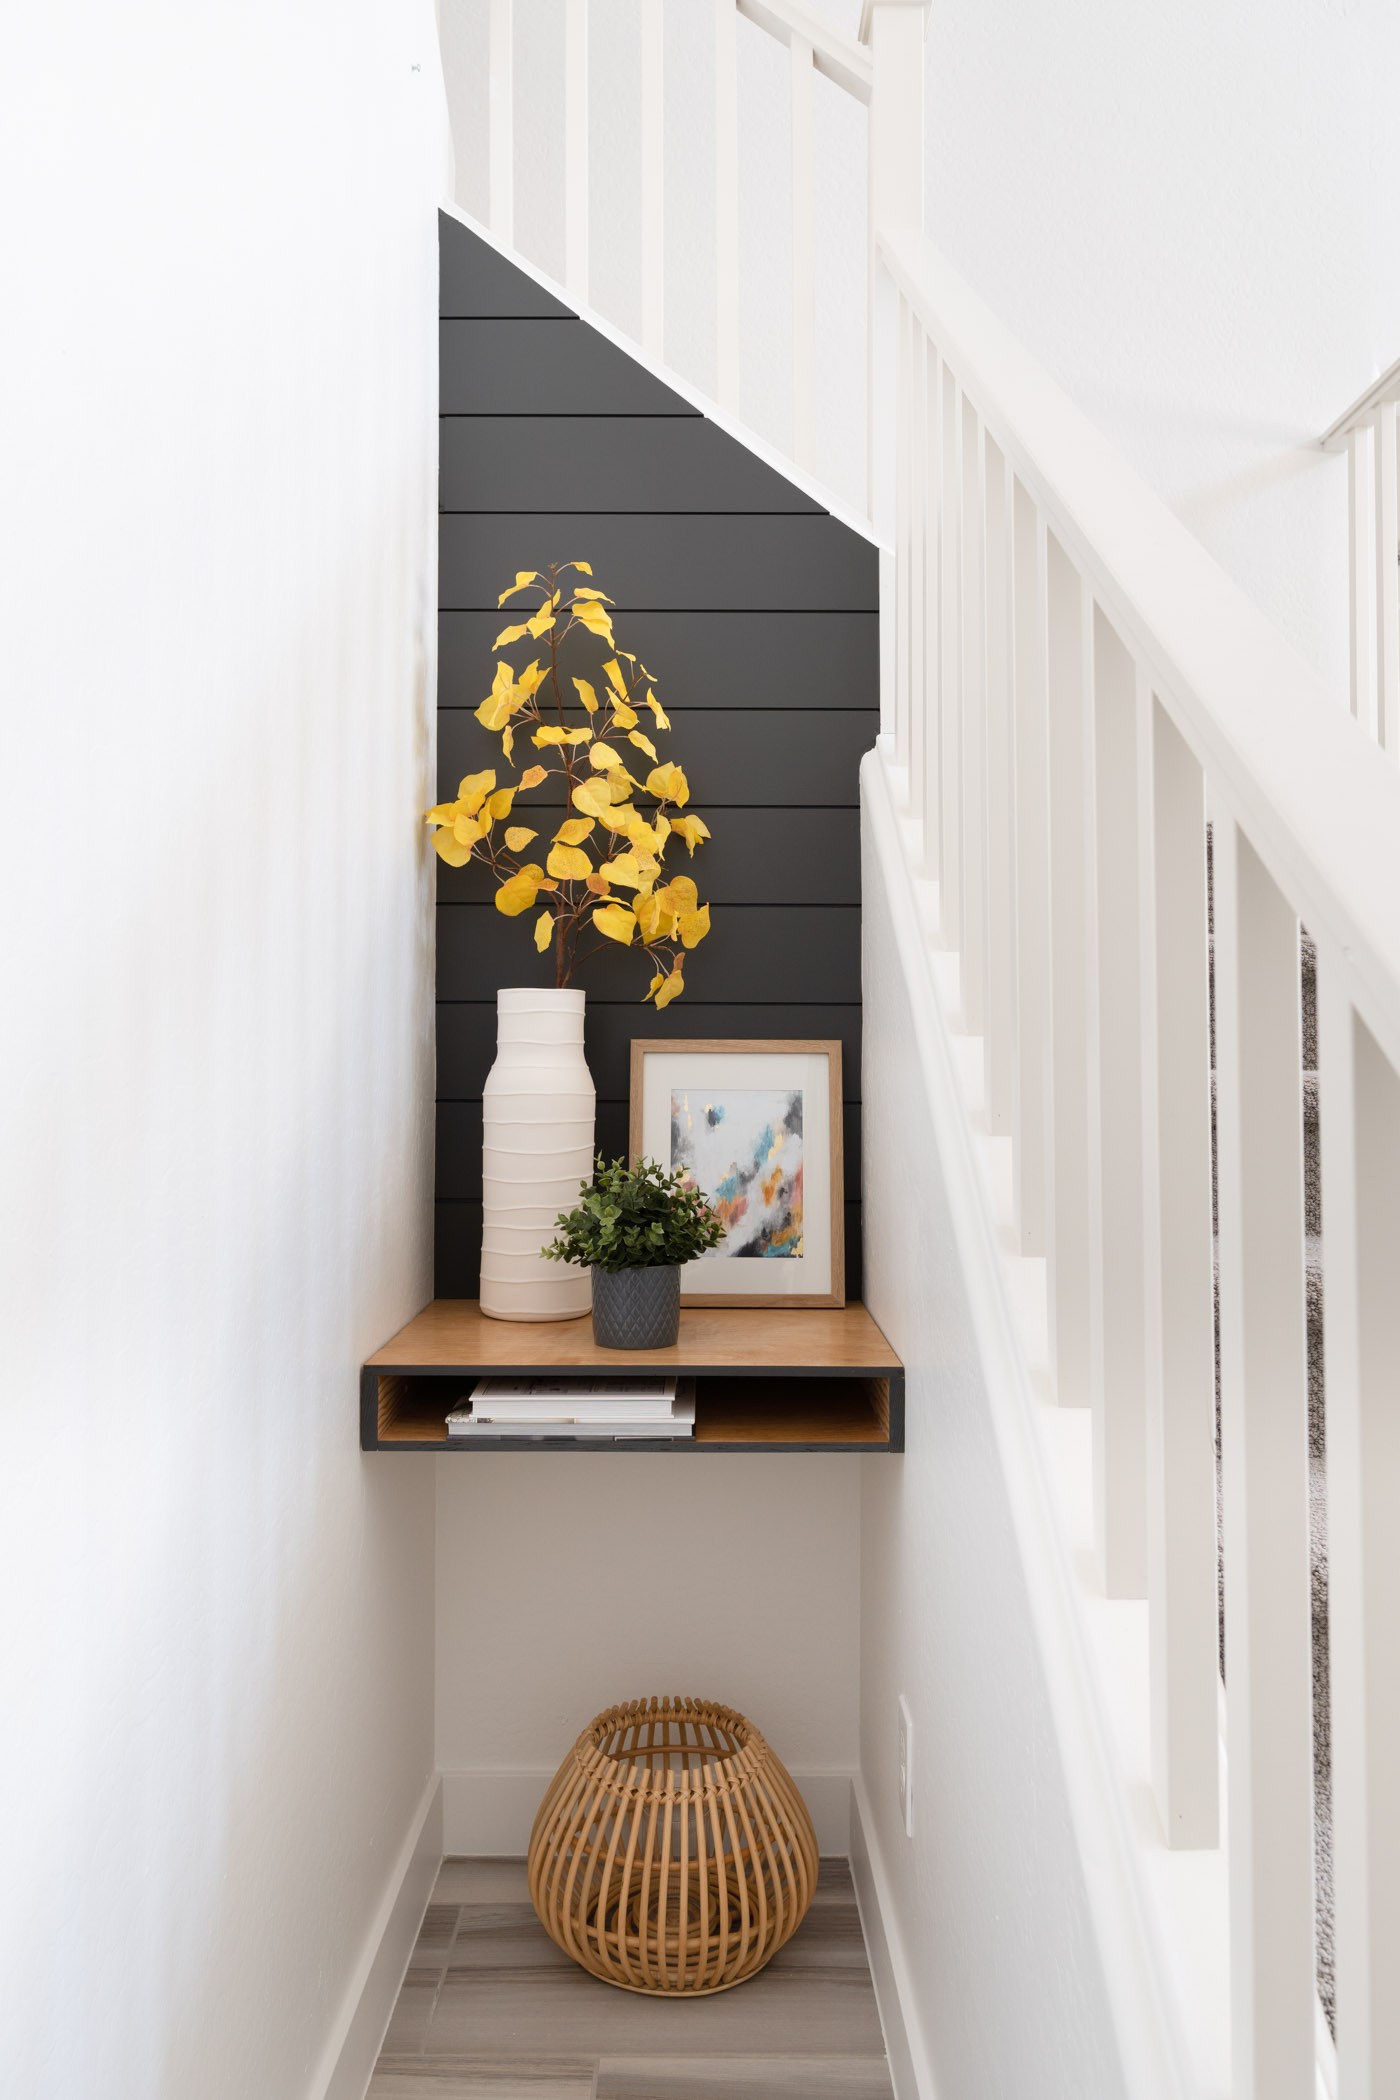
Bold Stairs Nook Reveal
I can’t tell you how many times I walk upstairs now and just admire this little corner! It is so striking against all the surrounding white! The final design is the perfect balance of beauty and functionality. I styled this space using minimal decor elements that enhance our design without overwhelming or compromising the overall look. I’d say mission accomplished on creating a bold design in a small space! Even the budget was small because our final cost for this project was less than $60!


I hope our transformation of this blank canvas into another gorgeous, functional space in our home, inspires you to look at these areas differently! See them for the potential they hold and rise to the challenge of creating more usable square footage in your home. Never be afraid to take bold risks in your designs! The result just might surprise you in the best way!


Be sure to check out our DIY Pocket Desk and Master Bedroom Reveal for more DIY inspiration! Now tell me, do you have any odd nook spaces in your home? Have I convinced you to tackle them? Until next time my friends!
Aminah Chung
It looks as if you did a trim of some sort around the shiplap, did you?
Hi Danielle, no we didn’t add a trim around the shiplap. Just caulked the gaps and painted.