
I can’t believe our new DIY playhouse finally came to fruition! We’re excited to partner with The Home Depot for their Doer Project Campaign, to create this dream playhouse for our girls! With more everyday folks, like us, taking on home improvement projects, The Home Depot has evolved to accommodate how we DIY! Through their delivery and curbside pick-up, project calculators, and truck/tool rental, it’s easier than ever to get more done!


This blog post is sponsored by The Home Depot, however, the opinions expressed are 100% our own. Affiliate links are also included in this post and we will earn a commission, at no additional cost to you, if you make a purchase using any of the links.
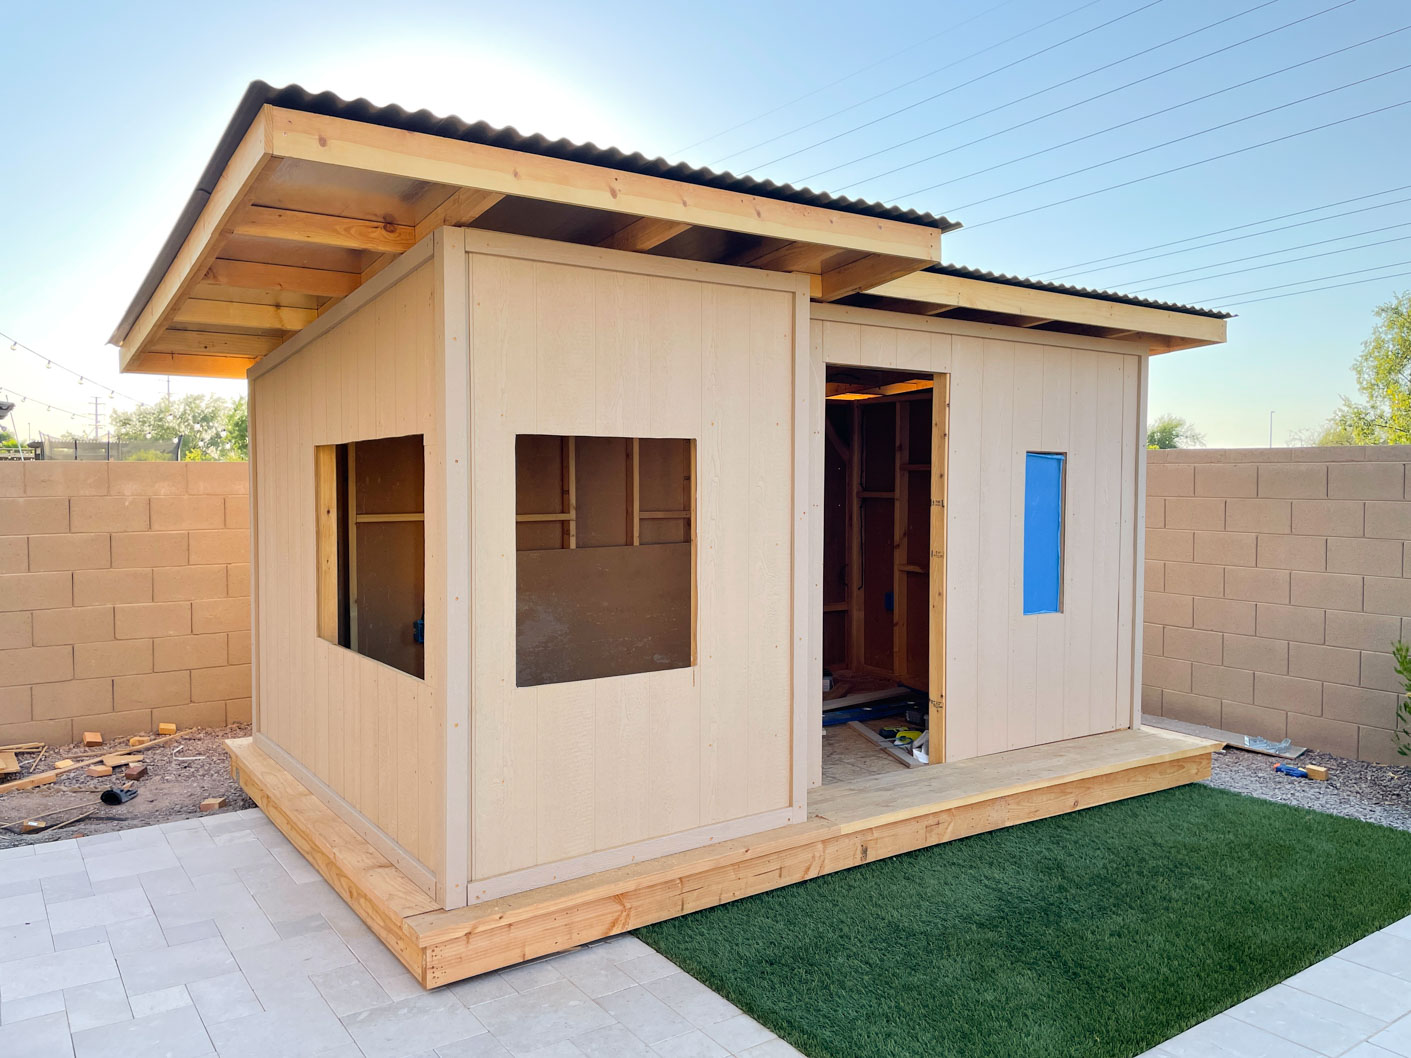
DIY Playhouse Foundation and Framing
The most important part of the playhouse foundation was the footings. We needed to dig 6 holes, each 12″- 18″ deep to support the 4″ x 4″ deck posts. This task was simplified by renting a 1 man auger from the Truck and Tool Rental Center at The Home Depot. The auger made fast work of the digging and we wouldn’t have been as efficient without it. We’re all about working smarter and not harder. So, if there’s a tool out there that can help your project along, save time and rent it!

We used a combination of pressure-treated and untreated lumber to create the deck/platform for the playhouse. This provided a stable foundation for us to build upon. For more details on our decking, be sure to check out our, “What You Need to Know About Building a Deck” blog post. The entire playhouse framing was constructed with 2″ x 4″ lumber. We also found it easier to build sections of the frame structure and then secure them together.

The Roof
We chose polycarbonate corrugated roof panels because they were fairly simple to install and provided the clean aesthetics we were going for. We also installed felt roof deck protection for an extra layer of protection between the roof panels and the roof sheathing panels.


Shop these products:

The Windows
To save cost on this project, we decided to build our own picture frame windows using plexiglass. We created the window boxes using 2″ x 4″ lumber and cut grooves in each piece to facilitate the plexiglass. We also made sure to seal (silicone sealant) around the window box where the wood and plexiglass met. Did you know what plexiglass is 20 times stronger than glass and insulates better? So happy with our choice!


Shop these products:
DIY Playhouse Exterior – Siding
We used engineered wood panel siding and trim for the entire playhouse exterior. We especially loved the shiplap edge on the panels, for a quick and easy install. Some other panel features we appreciated were them being pre-primed and, resistant to rot, mildew, and termite damage.
DIY Playhouse Interior – Drywall
We decided to install mold-resistant drywall as an added protection since the playhouse is next to our pool. The drywall sheets were secured to the studs using drywall screws and held with paper drywall joint tape. We applied joint compound over the drywall joints with a drywall knife and lightly sanded the surface once dry. All corners and ceiling-to-wall joints were further secured using corner beads. Here’s a hot tip for you! We used the Drywall Calculator from The Home Depot to determine how many drywall sheets we’d need for the playhouse interior! It removed the guesswork from this portion of the project!

Shop these products:
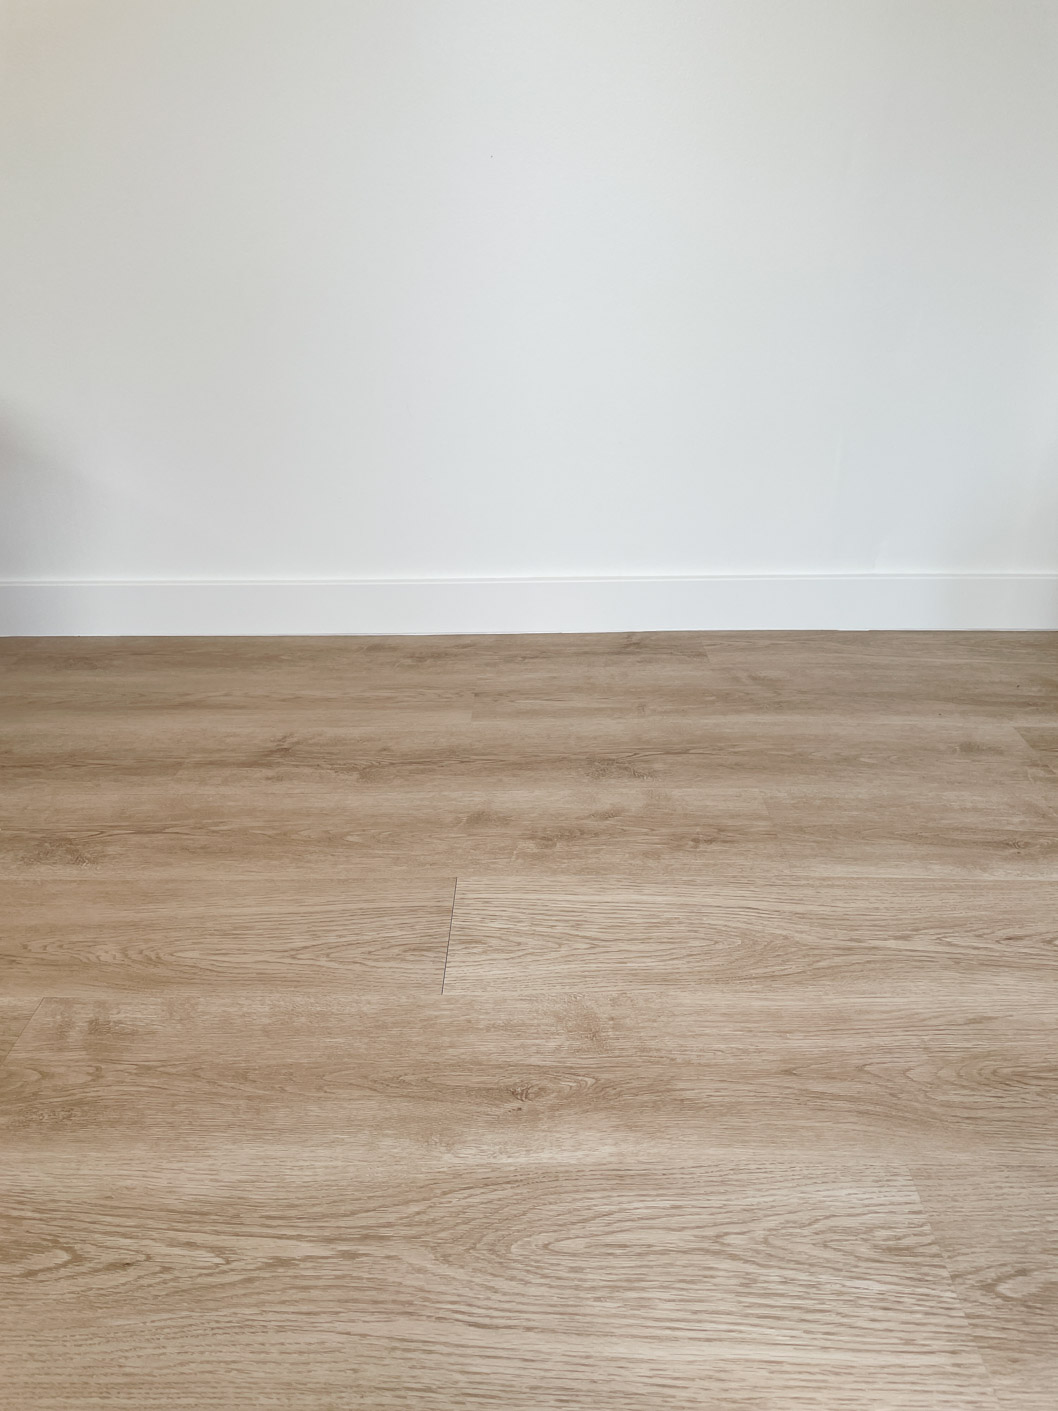
The Flooring
I’m so in love with the vinyl plank flooring we selected for the playhouse. It gives us the rich, textured, wood look we wanted while being affordable and durable. It’s 100% waterproof, making it ideal for our outdoor playhouse. There is a 1 mm underlayment already attached to the vinyl planks, but we still chose to install additional underlayment beneath them. We made this decision because of some gaps we noticed in the OSB subflooring.

Shop these products:
Not sure how much flooring you’d need for your space? We used the flooring calculator from The Home Depot and were able to purchase enough vinyl planks for the playhouse project! There were even extras to replace any damaged pieces in the future. We also highly recommend purchasing a floor installation kit to help with your flooring project.
The Door
There are so many factors to think about when building a door, including the actual door frame! We were very fortunate to have the best neighbor who walked us through all the logistics. We built the exterior portion of the door with pine boards but used plywood on the interior side. I used my personal concoction of Early American and Natural to stain both sides of the door. This stain combo has never disappointed me and we couldn’t be happier with the overall clean, modern look of this door. We made sure to apply a clear wood sealant prior to the final install to protect the wood from any moisture damage.


Shop these products:
New DIY Playhouse REVEAL
This project has been months in the making and the final view exceeded all my expectations! We’ve put in many hours on this playhouse build because our girls deserve our best work. I cannot wait to see them playing in their new space and creating memories with each other and their friends.


The Address
We had the fun idea to use the girls’ birthdays as their new playhouse address. The black, modern numbers were the perfect finishing touch to the exterior view of this DIY build. We secured the numbers to a piece of stained and treated pine board, creating the ideal contrast and dimension.

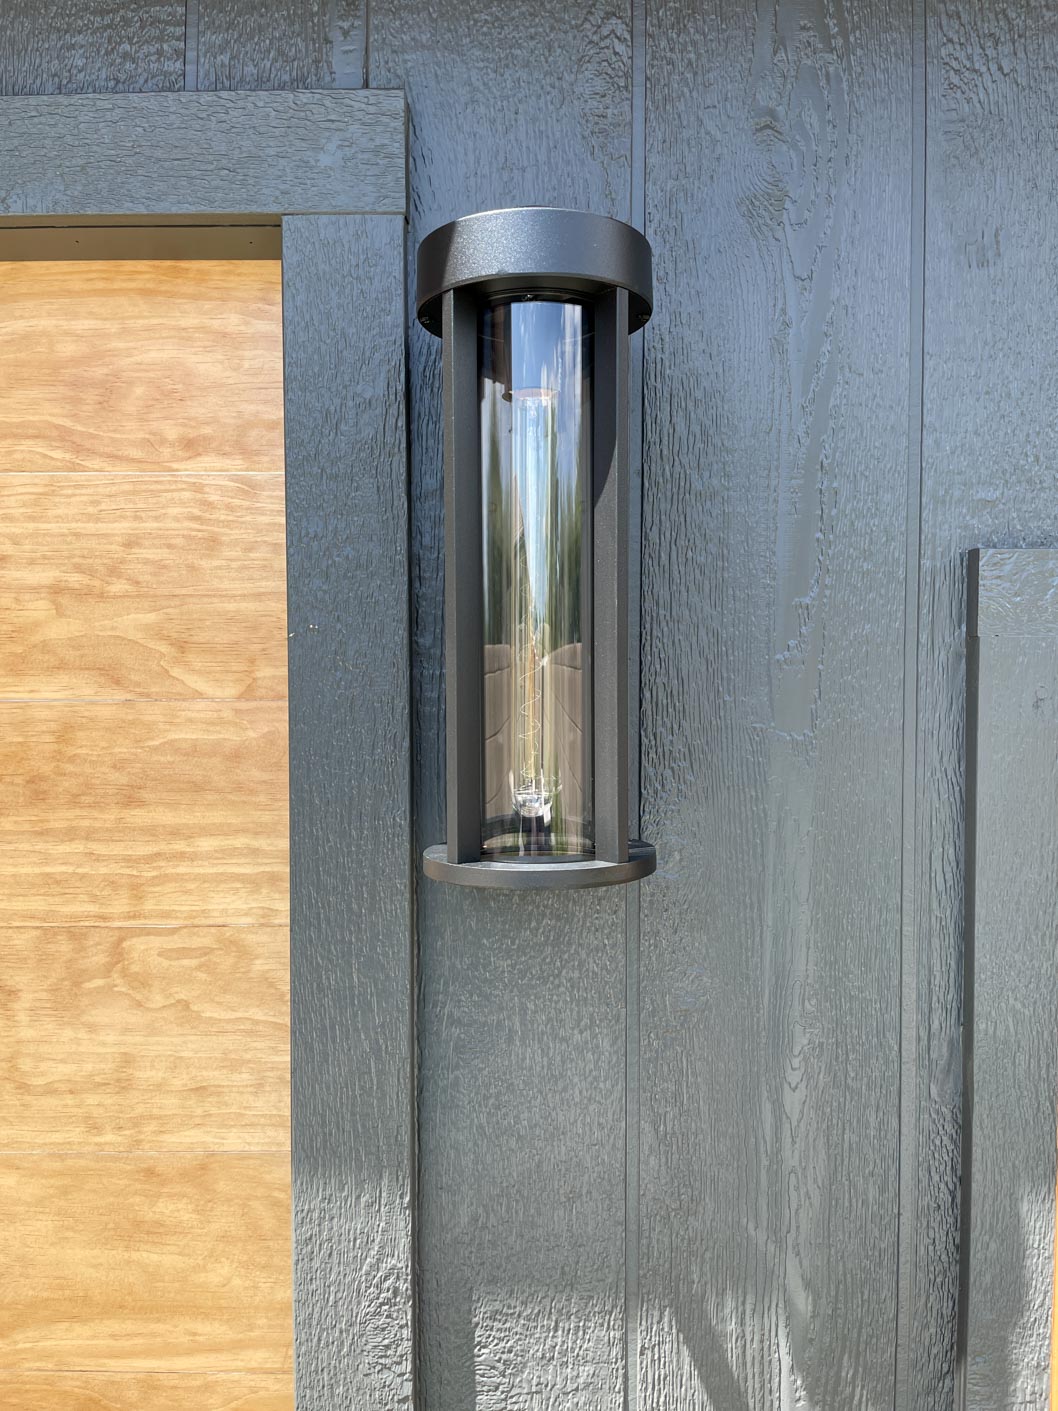
The Lighting
A house wouldn’t be complete without the perfect lighting. For the interior, we wanted a clean and minimal look and installed 4 recessed lights in the ceiling. I love asymmetrical designs, so on the front exterior, we installed one large wall lantern sconce. To create balance, we also installed 2 smaller wall lantern sconces on the side of the playhouse. I love the modern, rustic feel the exterior lights add to the playhouse.


Shop these products:
Additional Views


If you followed this DIY playhouse build over on Instagram, then you know how challenging of a project this has been for us! We didn’t quit! We persevered and are so proud of what we accomplished! I hope our determination can motivate and inspire you to keep going with that challenging project you might be working on. I can’t wait to hear what you think of this new space! Until next time friends!
Aminah Chung
Beautiful work. What are the exterior colors you used?
Thank you Doris! They’re SW Iron Ore, Pure White, and Morrocan Spice.
That is the cutest most awesomeness play house. I want to do the same but make it my she shed. Great job!!!!
Thank you so much Shannon! Good luck!
Hi
I love all of your projects every detail and decoration. The play house is so beautiful. What is the size of the play house please. Great job.
Thank you so much! It’s about 12ft x 8ft