
The upgrades we made in our DIY pantry created more usable storage and also added dimension to the space! Our pantry project was 4 years in the making and we’re so excited to partner with The Home Depot, as part of their Doer Project campaign, to create our dream pantry!
This blog post is sponsored by The Home Depot, however, the opinions expressed are 100% our own. Affiliate links are also included in this post and we will earn a commission, at no additional cost to you, if you make a purchase using any of the affiliate links.


I cannot believe I finally have the pantry of my dreams! So many hours of hard work went into creating this beauty and we couldn’t be prouder of how it all turned out! Today I’m sharing with you, our top 3 DIY pantry upgrades!
Pantry Dimensions
Just to give you a better idea of the space we were working with, our pantry measures about 58 inches wide x 66 inches long x 10 feet tall.
Pantry Demo
Living in Arizona, most interior walls are textured, and these can be very difficult to match after drywall repair. When we removed all the old pantry shelves, there were clear distinctions between where the old shelves were installed and the rest of the wall. We then discovered that a stud was missing. After we installed a 2″x4″ stud and repaired the drywall, we made our best attempt to texture the wall. That didn’t work out so well and shiplap became our plan B, but really, it should have been our plan A!


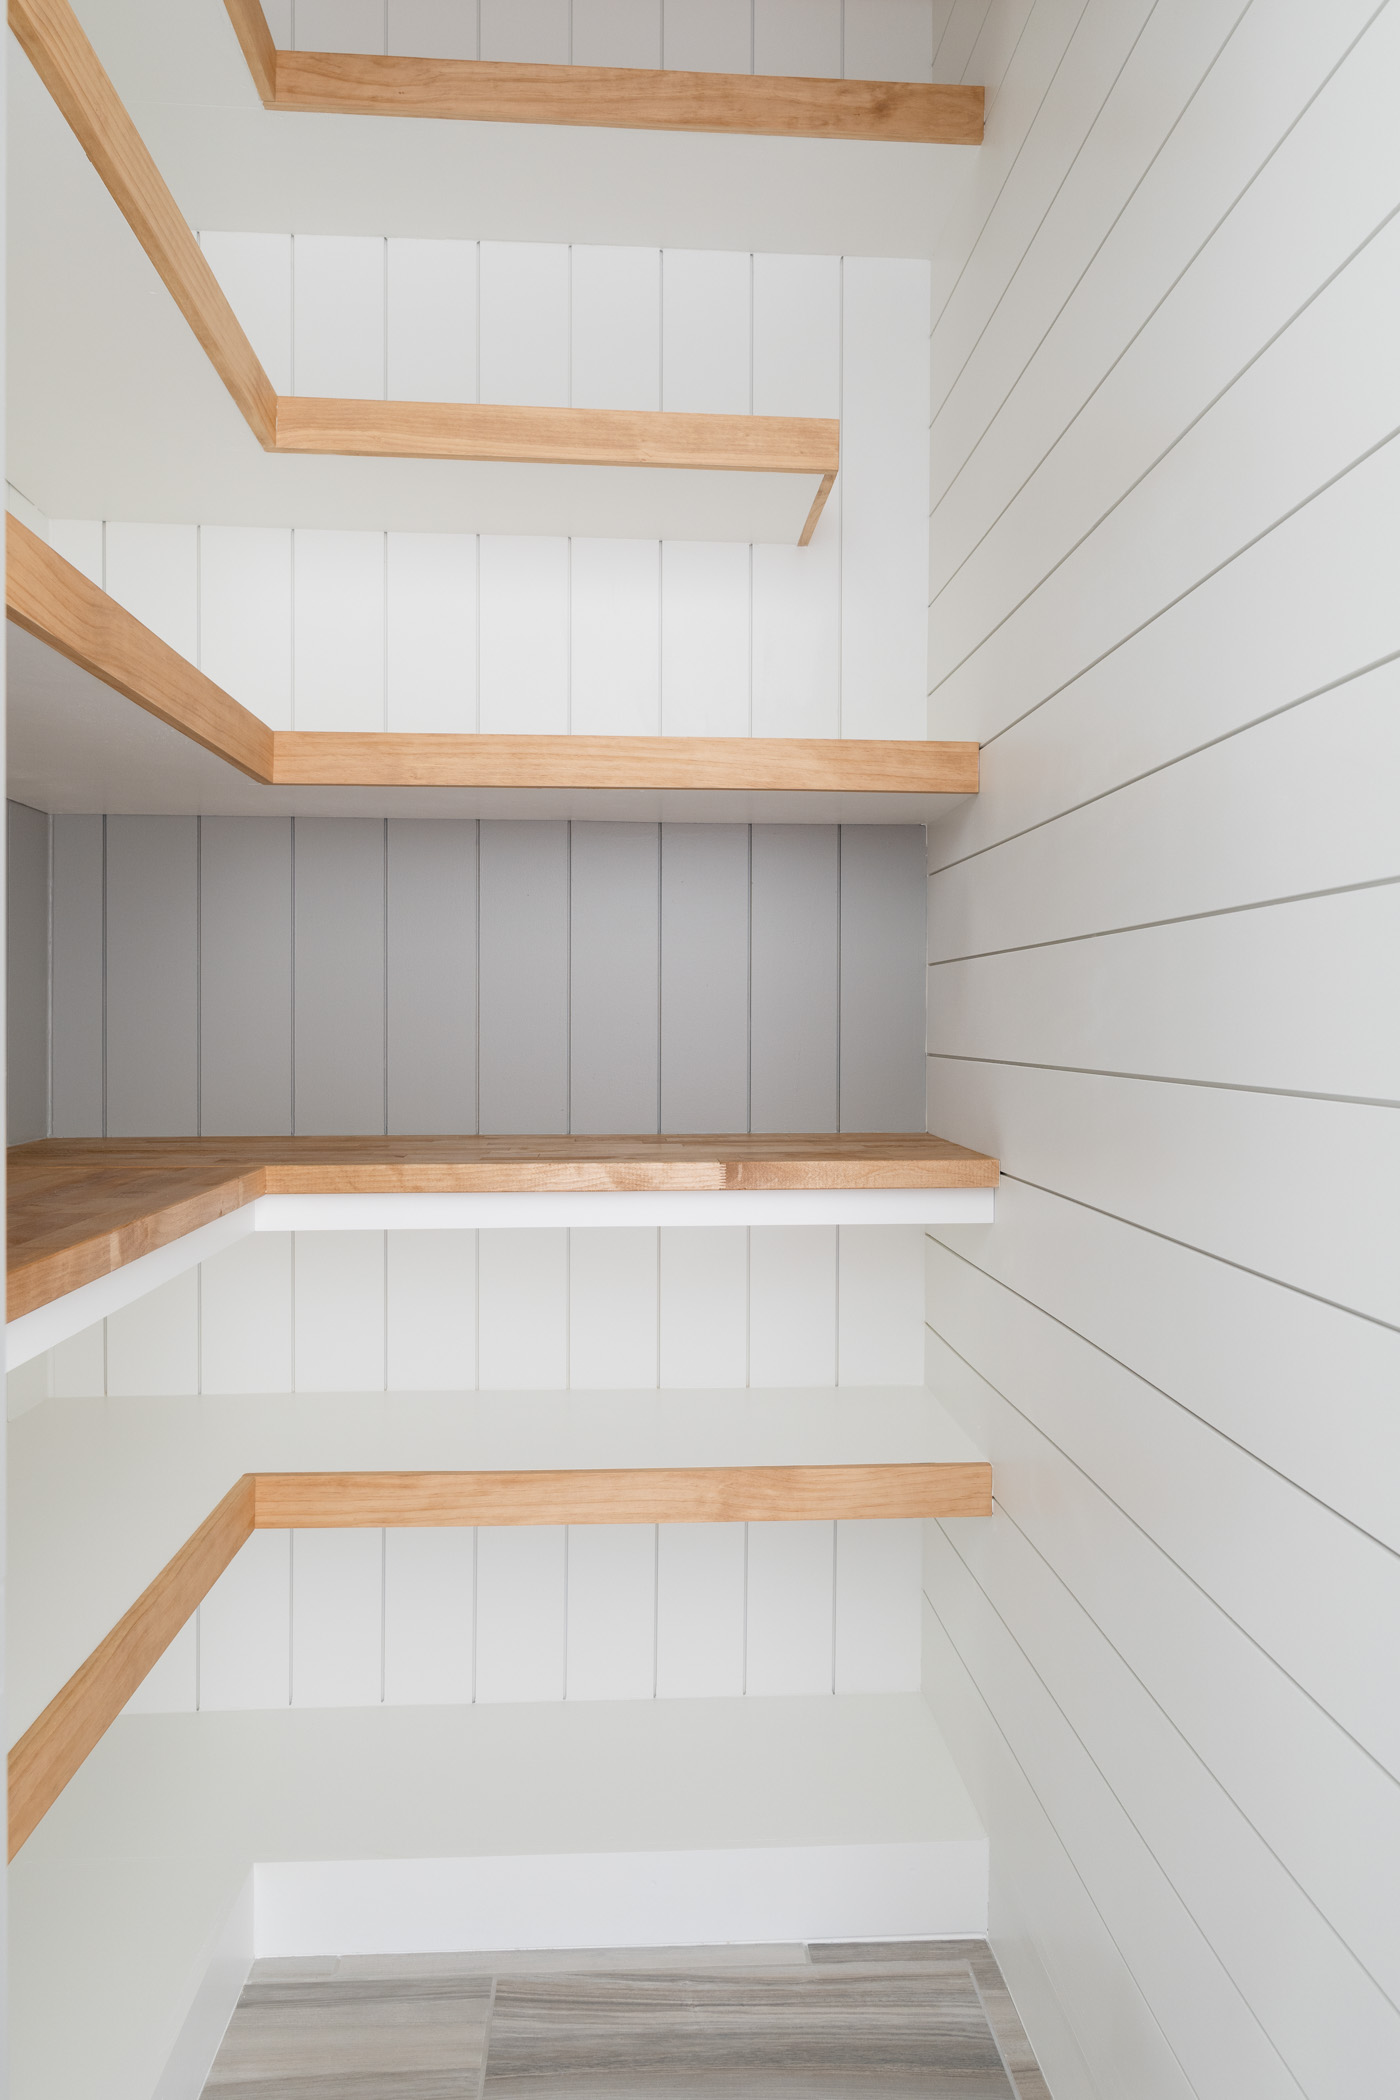
1. Shiplap
Although shiplap was not a part of our original pantry design, I’m so glad we decided to go the extra mile! The number 1 question we get asked is about the type of shiplap we use. All the shiplap in our home is 6″ wide primed MDF shiplap. I was so relieved that our local Home Depot had enough shiplap boards to save the day! We even rented a trailer from their Truck and Tool Rental Center to haul the shiplap and other building materials to our home.


Installing Vertical vs. Horizontal Shiplap
We’ve installed both vertical and horizontal shiplap in separate projects before. This, however, was the FIRST time we were installing both orientations in the same project! Before we installed the vertical shiplap, we first created a backing using 1″x 2″ furring strip boards. Since studs are typically spaced 16″ apart, if we’d installed the vertical shiplap directly into the drywall, they all wouldn’t hit the studs. Creating a backing, that’s screwed into the studs, allows for a more secure install. The horizontal shiplap, however, was secured directly into the drywall.


If you’re a fan of shiplap, then you’ll want to check out the other shiplap projects we’ve completed in our home: Master Bedroom || Stairs Nook || Loft Alcove
2. Plywood Floating Shelves
I’ve always wanted floating shelves in our home and including them in my pantry design was an easy decision! This was one of our best DIY pantry upgrades because it was structurally a sturdier shelving option than what previously existed. We started by building the frame structure using 2″x 2″ lumber. The rest of the shelving was built using 3/4 in. plywood and pine boards. The overall thickness of each shelf is 2-3/4 in. The floating shelves were an interesting build, complicated by my desire to not have visible screw/nail holes in the front of the shelves. We achieved this by first screwing in the top of each shelving, from the underside. Next, each shelf face would be installed, screwed in from the back. Lastly, the bottom of each shelf was screwed in.


Painting the Pantry
Once the shelf tops were installed, we decided to go ahead and paint the pantry. Did you know paint needs adequate time to cure? Depending on the brand and type of paint, it could take 14 – 30 days or even longer! We figured painting sooner was in our best interest! In The Home Depot app, you’ll find several handy project calculators to help take the guesswork out of your project! I used the paint calculator to determine how much paint we needed to repaint our pantry! I simply entered all the requested measurements into the calculator and it gave us a pretty accurate quantity of 2 gallons.


We used a Graco paint sprayer because it leaves a smooth, and even finish! While the painted surfaces were drying and curing, we proceeded to install the shelf faces and bottoms. The white paint color is Pure White by Sherwin Williams. The stained shelf fronts are a mixture of Natural and Early American. I use about 2/3 Natural with 1/3 Early American and the resulting color was the perfect, warm brown that this pantry needed.
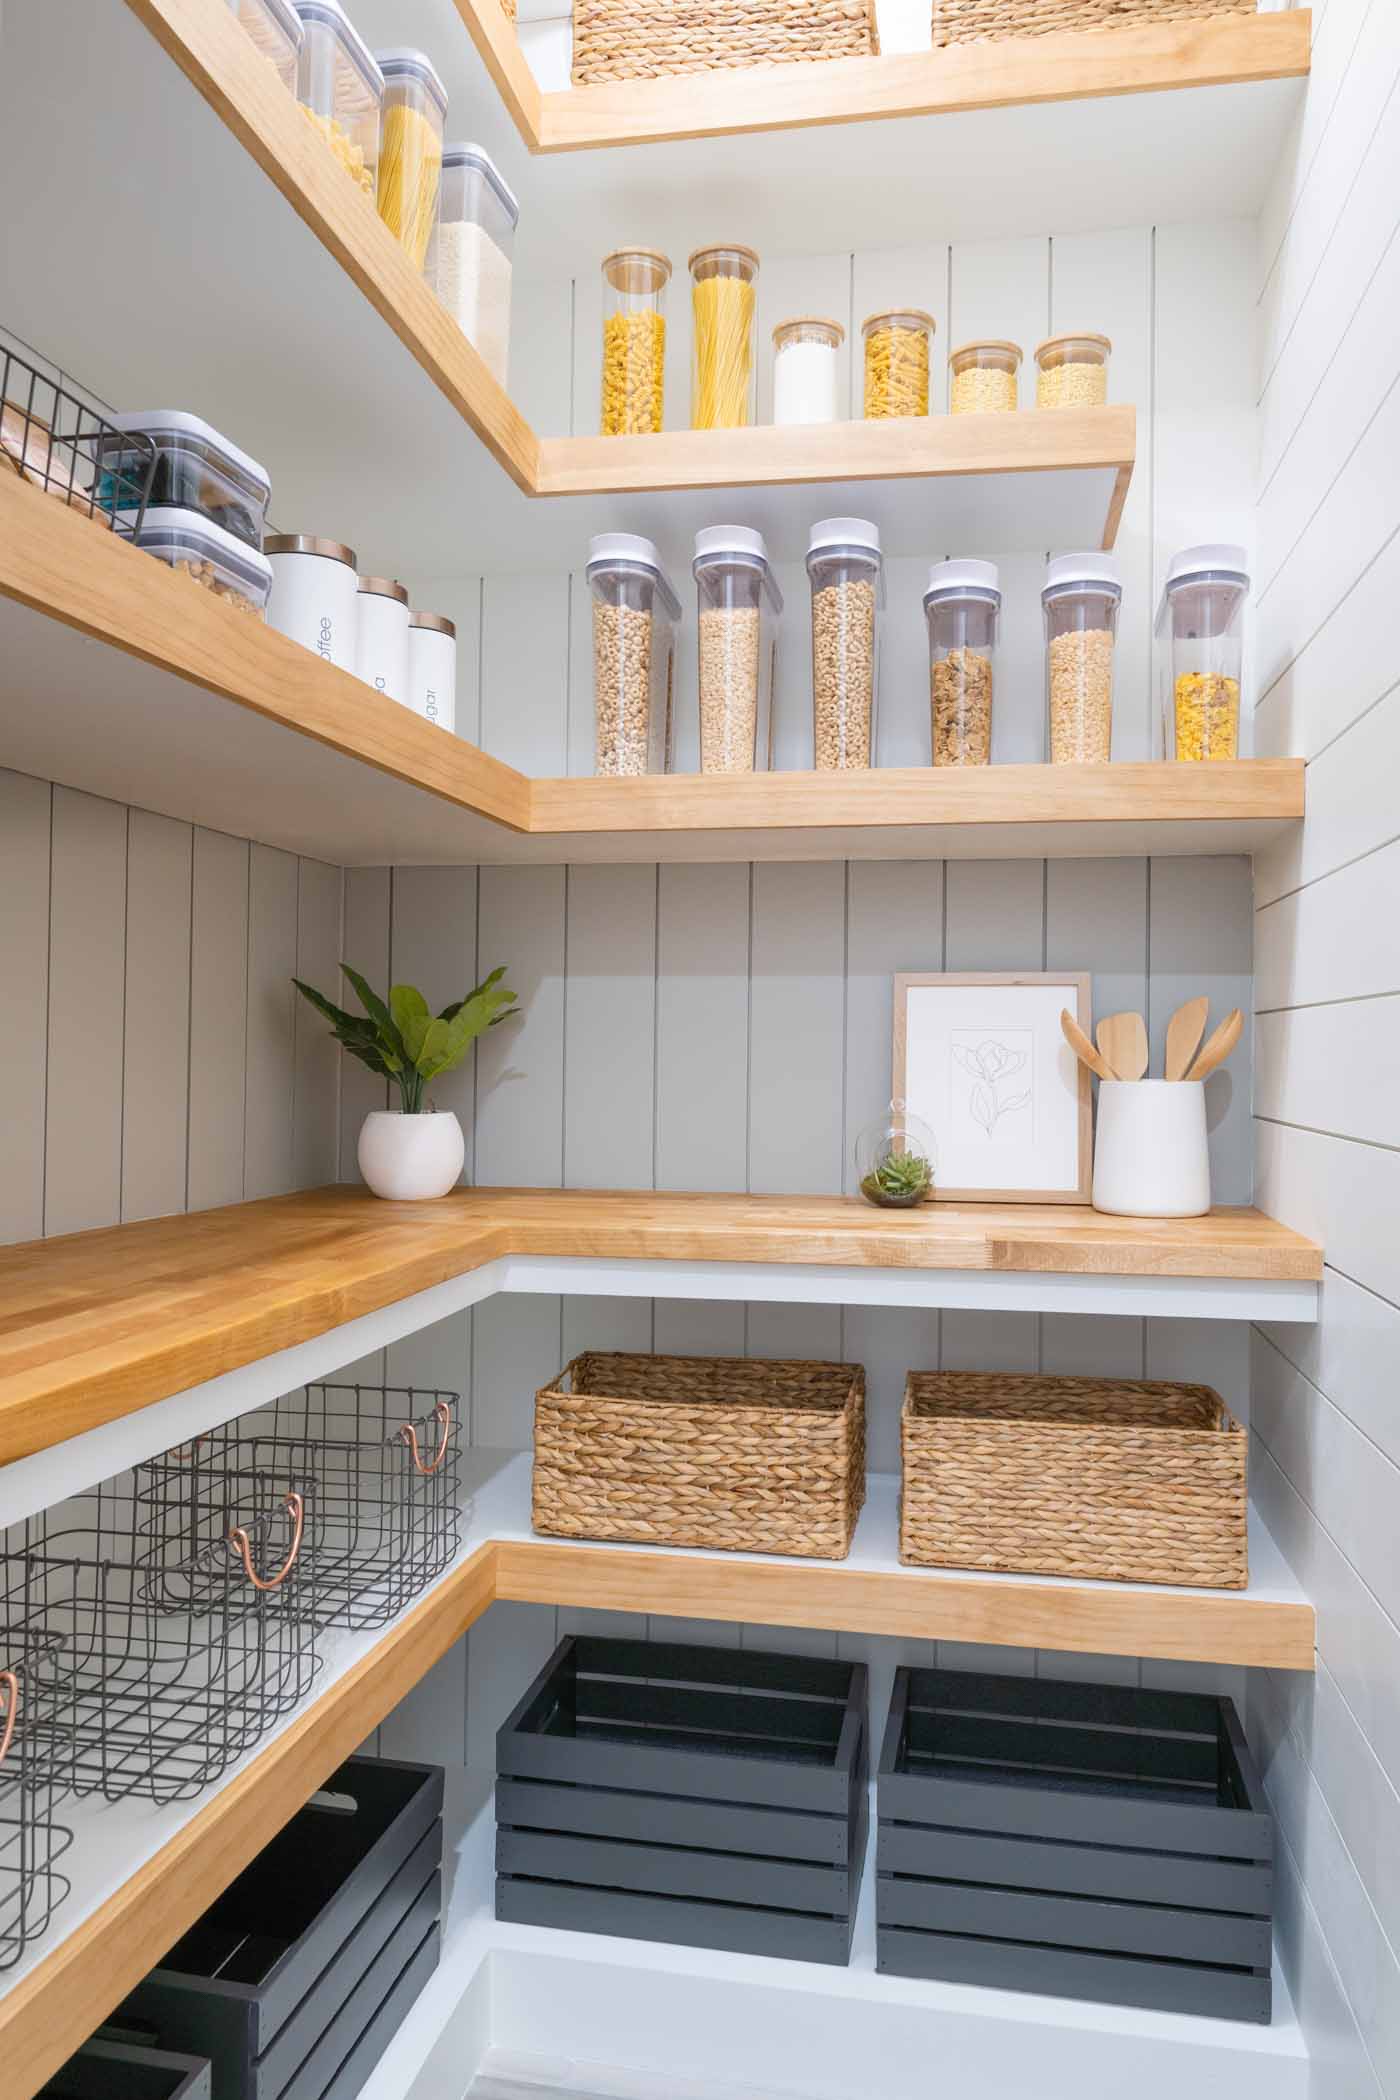
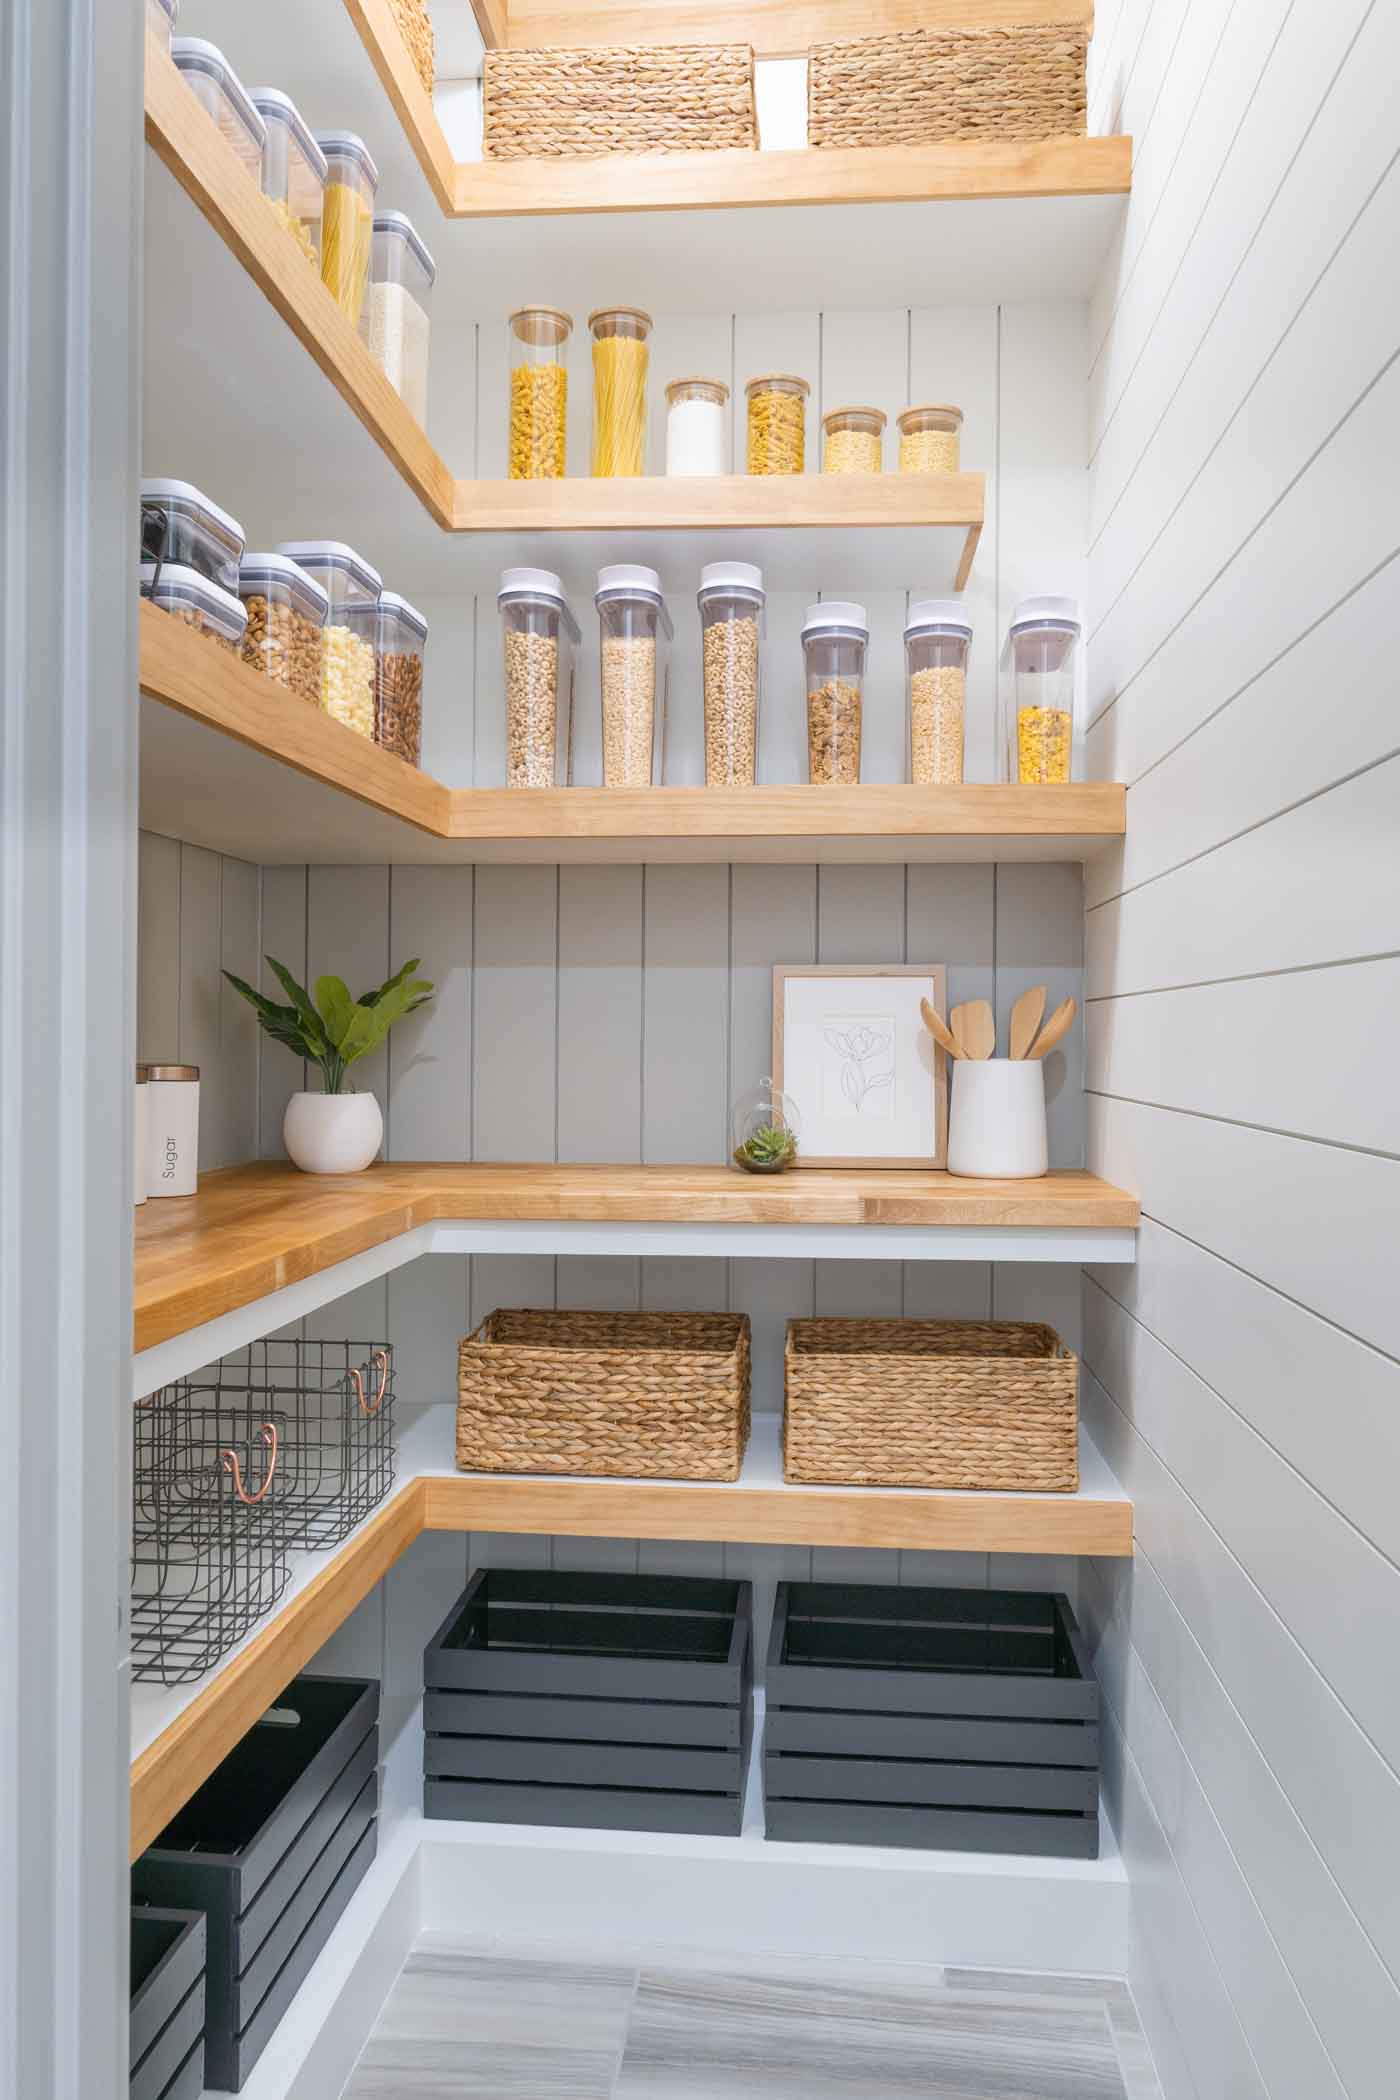
3. Butcher Block Countertop
I think we’re all a little obsessed with butcher block countertops! This was another one of our best DIY pantry upgrades because it allowed me to include more wood elements. It’s also a great focal point in this pantry space!

This butcher block countertop is Unfinished Birch and gorgeous as is, but we decided to stain it to create a more cohesive and aesthetically pleasing design. We did screw the butcher block countertop onto a 2×2 frame structure, from the underside.


DIY Pantry Reveal
I don’t think photos can do this space justice! The clean lines of the floating shelves, paired with the added dimension of the two shiplap orientations make me want to do a happy dance! Not to mention the color combination that ties the whole design together!


The stain on the butcher block countertop turned out beautifully! The stained pine board shelf faces are slightly lighter than the birch countertop and I love the subtle contrast. The gray paint color is Dorian Gray by Sherwin Williams.

Pantry Shelving Heights
Let’s start with the bottom shelf which has a 17 in. height and sits on top of a 5 in. base structure. Next is the shelf right below the countertop with a 13 in. height. The height between the countertop and the shelf above it is 19-3/4 in. The two shelves above the butcherblock countertop are both 15-1/2 in. high. Creating various height shelves allows me to efficiently utilize their storage potential. If you’re curious as to why one of the upper shelves doesn’t touch the wall, you see that HERE.

Styled Pantry
Did you know The Home Depot offers a huge selection of storage and organization products? I’m absolutely in love with this 3-piece metal canister set! The white finish and copper lid provide the perfect modern simplicity.

I enjoy mixing textures, so I also ordered some glass storage jars with bamboo lids. These are great for displaying your pasta and baking essentials.

I saved the BEST views for last! There are so many pretty details to appreciate in our DIY walk-in pantry! The shiplap, floating shelves, and butcher block countertop are some of the best upgrades we could have made to this space!
To see the vision I had for this pantry become a reality brings me so much joy! We are very grateful to have had this amazing partnership experience with The Home Depot! Thanks for following along on another fun DIY! Let me know your favorite DIY upgrade in our new pantry! Also, happy to answer any questions you may have about this project. Until next time friends!
Aminah Chung
What is the thickness of the top and bottom plywood. And what type of plywood did you use to make it durable.
Thank you
Hi there! We used birch plywood with a 3/4 in. thickness
Thank you… what about the underside of the top shelves to cover the frame
That’s also 3/4″ birch plywood.
Thank you … appreciate it.
What are the dimensions of your pantry? Also, do you have a picture of the door and the placement of your pantry in your kitchen?
Hi Brooke, so our pantry is about 65″ x 55″. I don’t have a photo at the moment to share but our pantry is located right off our garage entrance and before you actually get to our kitchen.
It looks great! What is the paint color of the pantry door?
Thanks Christi! It’s SW Dorian Gray
Hi Aminah! Gorgeous pantry. My husband and I are attempting to replicate, but we are beginners and it’s much harder than we thought, as we have water lines in the back of our pantry and are trying to avoid those while making everything structurally sound. What size nails and/or screws did you use for the a) furring strips and b) floating shelves? We are thinking screws for more security.
Hi Kelsey! We love hearing when others are inspired to update their home! So we used 3″ screws to create the frame structure (furring strips) for the floating shelves. We also used 3″ screws to secure the furring strip frame (for the floating shelves) to the walls. When we were securing the plywood/pine boards on top of the frame, we used 2″ screws. Hope this helps!
Aminah—thank you for the response! Another quick question, if you don’t mind. Does the 3″ screw that secures the shelf frame to the wall actually go into the wall stud? I’ve read screws should be at least 1″ into the stud, but 3″ wouldn’t reach, because the screw would have to go through the 2×2 frame, the 1/2″ shiplap, the 1″ furring behind the shiplap, and then another 1″ into the stud. But a 4.5″ screw seems excessive… what am I missing?
That’s a great question Kelsey. So the screw would be going into the 2×2 wood (actual is 1.4″), the 0.5″ shiplap, and the 1″ furring strip (actual is 0.7″). Remember the furring strip is already secured to the studs so we felt confident in using the 3″ screws. You could get longer screws if that makes you more comfortable.
What an extremely beautiful pantry. I had an open pantry in mind in my kitchen and your project just motivated more.
The outcome of your project is truly inspiring. I love your blog 🙂
Thank you so much
Oh wow! Thank you so much! Our pantry has been a popular one!